|
Helpful hints:
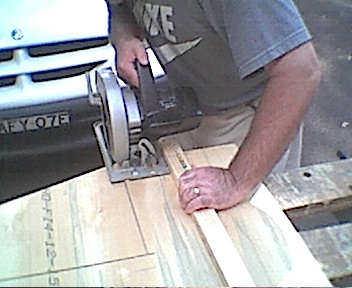
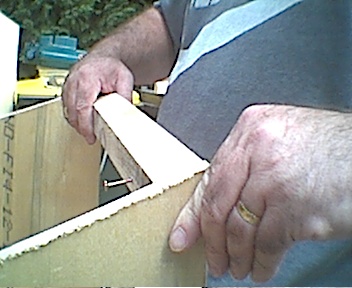
When Cutting straight edges it is a good idea to use a cutting guide. You can use a piece of scrap timber,
screwed to the plywood you are cutting (as shown in picture 1)
How to build a skate ramp
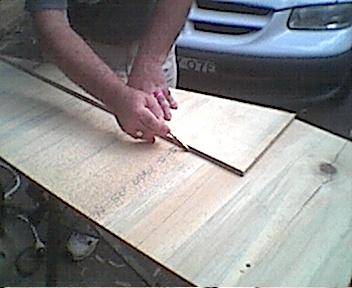
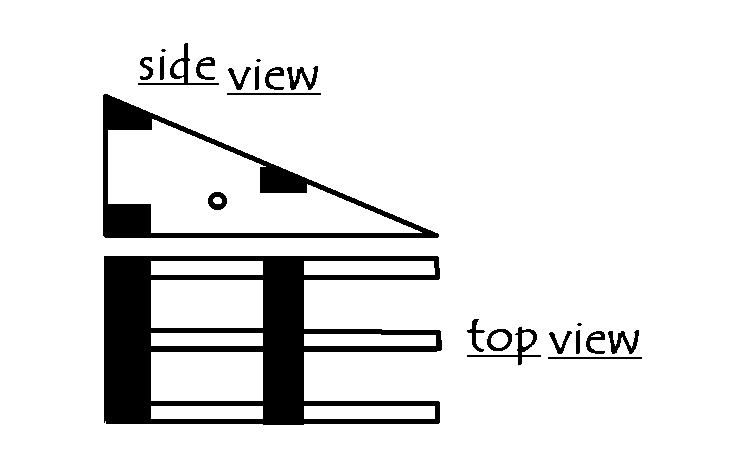
Step 1: Get the 12mm thick plywood and cut it so you have 2 identical right angle triangles base 900mm and height
300mm. These form the sides of the ramp.
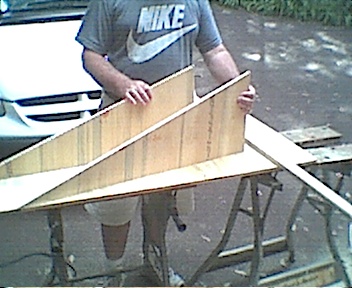
Step 2: Get one of the pieces of framing timber. This needs to be shaped with a plane so that one side is at the same
angle as the top edge. Then Screw this timber first to one of the sides then the other making sure that all the edges are
flush. Place one of the other framing timber pieces at the bottom right angle edge, and screw it in place. The last piece
of framing timber is placed about midway along the hytpotenuse, and screw it in place.
NOTE: When screwing these framing timbers in place first use just one screw until you are sure that the sides are level
and square with the timber.
Step 3: From the left over piece of plywood cut a piece 250mm wide by 576mm long. Use the Plane or Electric plane
to shape one edge so that it has the same angle as the sharp end of the ramp. Glue and nail this piece in place as shown.
Note: Nails are used to hold this piece in place while the glue is drying. DO NOT USE SCREWS, otherwise the plywood will
split.
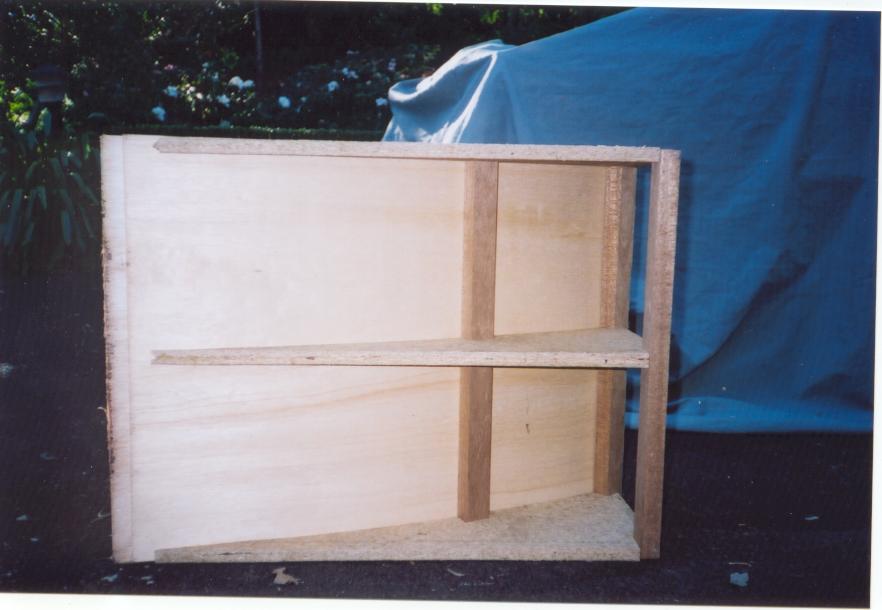
Step 4:
Place the plywood top on the frame & line it up with the top and the sides. Screw it to the framing
timbers. DO NOT SCREW TO THE SIDES, otherwise the plywood will split.
Using the Electric Plane or Plane, shape the bottom edge so that it is the same angle as the sharp end
of the ramp.
YOU HAVE SUCCESFULLY MADE YOUR SKATE RAMP! HAVE FUN, DONT BREAK YOU LEGS.
REFER TO PICTURES FOR MORE DETAIL.
How to build a grind rail!
Tools Required
- A length of scaffolding pole (steel is better, but harder to nick and more difficult to drill).
- A drill with a range of bits for drilling steel.
- A Black & Decker workmate or similar to hold the pole while drilling.
- One of those drill bits for drilling 1" wide holes in wood.
- A pencil and ruler.
- Wood screws, washers, and a good screwdriver. Number and type described below.
- A length of wood, 1" by 12" as long as your rail.
- Sections of wood, 1" by 12" and as long as you want your rail high (max 12")
The number of screws, washers and wood sections depends on the length of rail you want to build. For each support, you
will want 4 screws, 2 washers and 1 wood section.
The screws should have a head no larger than the biggest metal drill bit you have (no more than 10mm) but a narrower thread
(5mm is good) and be about 1.5" in length.
The washers need to be fairly big. The outside diameter of about 20mm, the inside diameters bigger than the screw thread,
but smaller than the screw head.
You will need to have one support at each end, then one every 3-4ft. So if you have a 10ft rail, you put a 1ft support
at each end, leaving an 8ft gap. You then only need on more support in the middle. So work out how many supports you are going
to need, and collect all of your tools.
Procedure to follow
- Measure out and place your supports on the base.
- Mark the positions of the supports and remove. Do the same on the other side.
- Within the area marked out for each support, use the wood drill bit to cut 2 holes half way through the base from the
under side, as in Figure 1 below.

Figure 1 - recessing screws
in base
- Place the base upside down on the supports, put a washer in each hole, and screw the base onto the supports. Turn the
whole thing back up the right way so it site on the base.
- Lay the pole on the supports as it will be fixed, then mark two points to drill the pole for each support as in figure
2 below.

Figure 2 - Side view of
the whole rail
- Secure the rail and using a drill bit the same diameter as the screw thread (or slightly larger of necessary) drill vertically
down through both sides of the pole where marked.
- Swap the drill bit for one slightly bigger than the screw head, and enlarge the holes on the upper side of the pole.
- You should now be able to drop a screw through the top hole, so the thread goes through the bottom hole. Put the pole
on the supports, and screw it down by inserting the screwdriver through the top hole, as in Figure 3

Figure 3 - cross
section through completed rail.
Your rail should now be complete. Before doing anything on it with your board, try pulling and twisting it to ensure it
is safe. If it feels safe, get your board and try doing some boardslides or something.
|